How to Set Up a New Package:
Create a new package, manage classes that members on the package are allowed to book and allocate programmes as to which workouts the package has visibility to.
1. How to set up a new package navigate to:
Settings > Packages > Create Packages > Enter the package details and Save Package
Sections explained:
- Name: The name you choose to call the package or membership option
- Description: What the package includes and what details thereof
- Package Type and sessions included in this package:
- Limited = x amount of once-off credits. Usually used for class passes or bundles. Once the sessions are used up they cannot book any more & additional credits would need to be purchased.
- Weekly = x amount of sessions that renews on a weekly basis. A weekly limit type only allows x amount of sessions per week and members can not book over the weekly allowance. Once the sessions are used up for the week they cannot book any more & additional credits would need to be purchased.
- Monthly = x amount of sessions that renews on a monthly basis. A monthly limit type only allows x amount of sessions per month and members can not book over this limit. Once the sessions are used up for the month they cannot book any more & additional credits would need to be purchased.
- Monthly & limit set to zero = unlimited amount of sessions per month. This is used for unlimited memberships allowing the members to book as many sessions as they like. This is also dependent on the booking settings of the facility.
- Price: Cost per month or per once-off package (limited packages)
- Top-up: The top-up price is the price that will be charged for each additional session that the member wishes to purchase. This is for all packages that are NOT unlimited. Members can then buy as many extra sessions as they would like to add to their package via the app.
- Default period type and period: Run time before the package becomes inactive from the date of sign up eg. month and 3 (for 3 months run time). If the package is monthly ongoing leave the default period empty.
- Package Visibility: Allocate package category and priority on the full packages list. This can be left blank if chosen not to implement these options
- Display package on sign up page: Hide or display certain package options that members can sign up to on the sign-up page when using the sign-up widget.
See Sign up settings - Allow purchase of package through Octiv mobile app? Hide or display certain package options that members can add or sign up for via the app
See App: Buy Packages
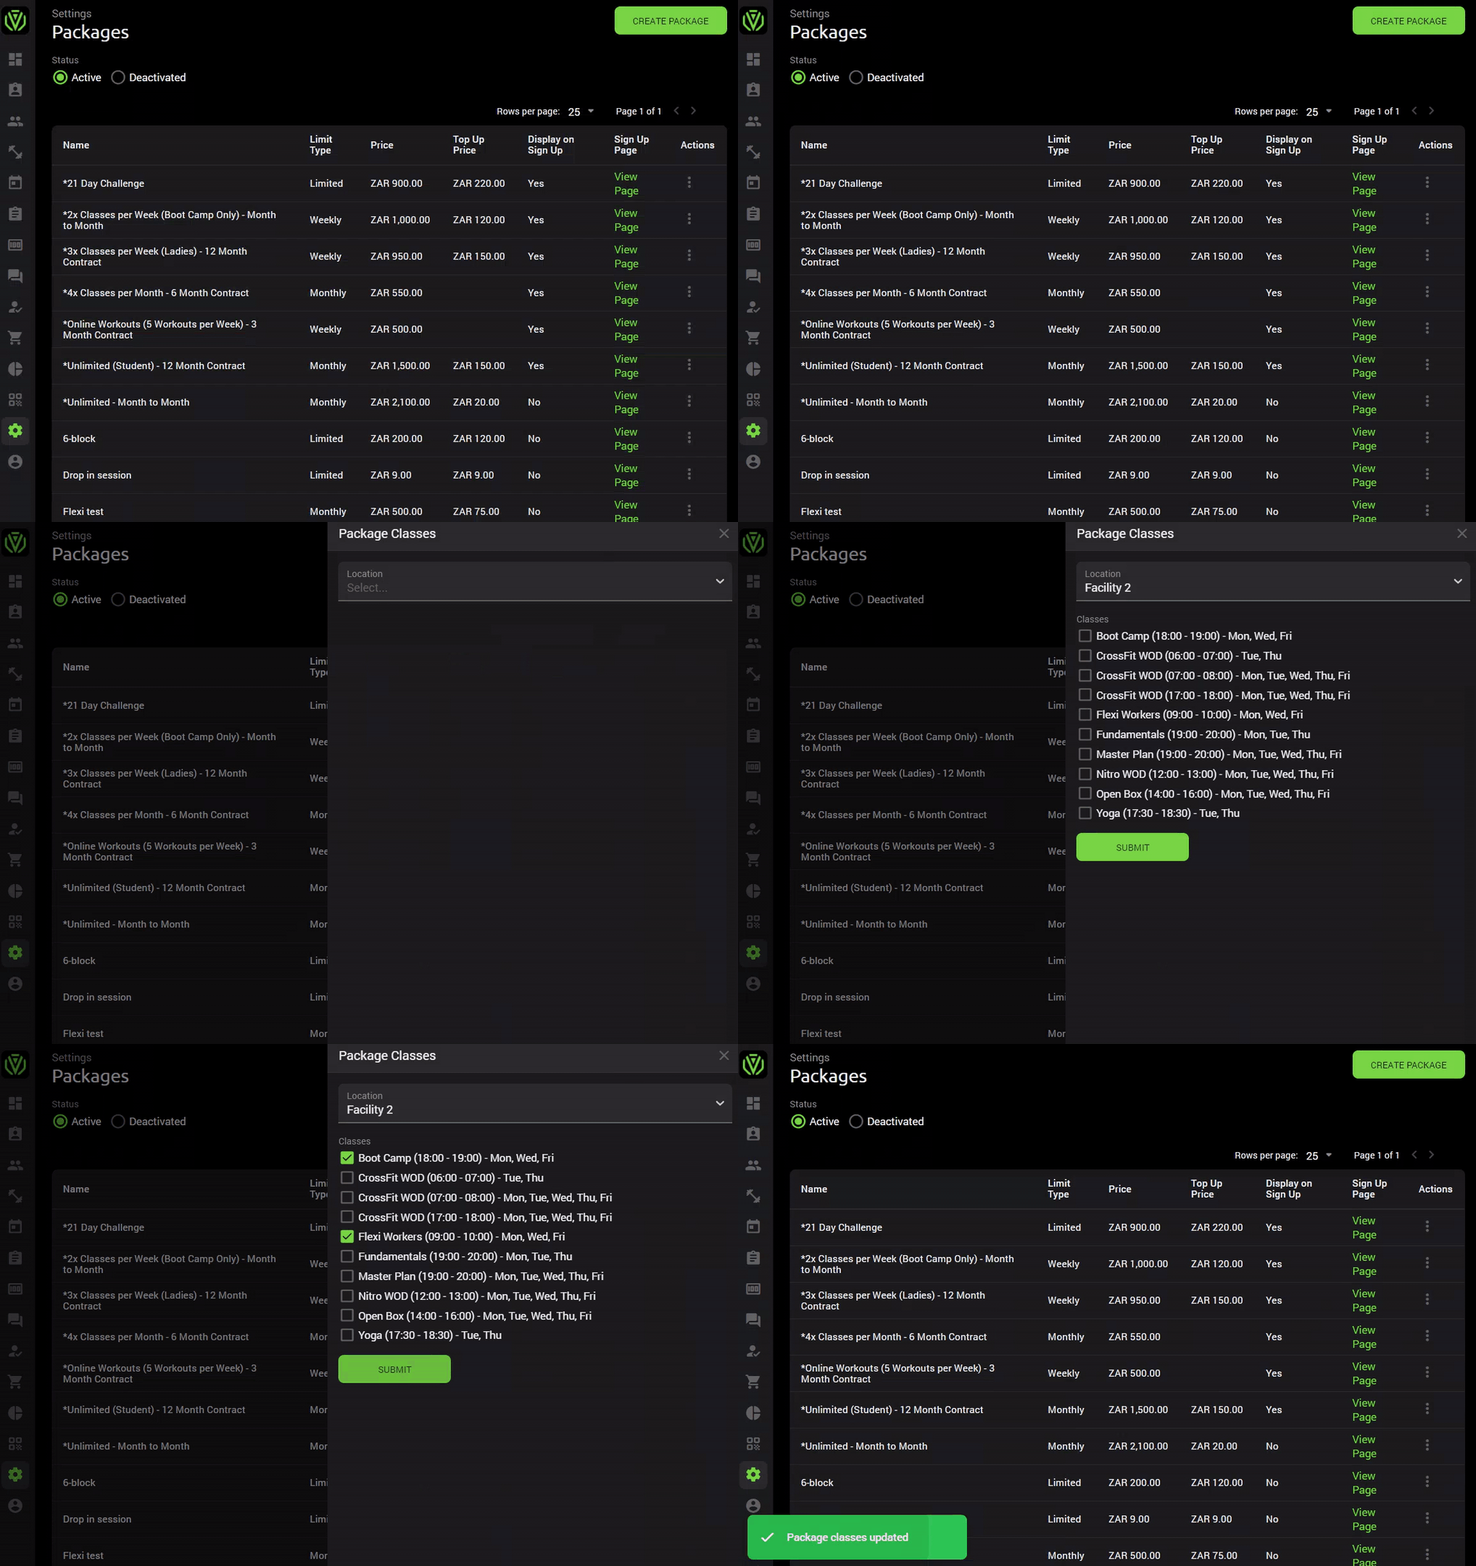
2. How to add classes to the package:
Control which package options have access to which classes.
Settings > packages > click on the action button next to the package > manage classes > select which classes have access to this package > submit
If you have more than one location make sure to allocate it to either the correct location or to tick the classes the package is allowed to book for at each location.

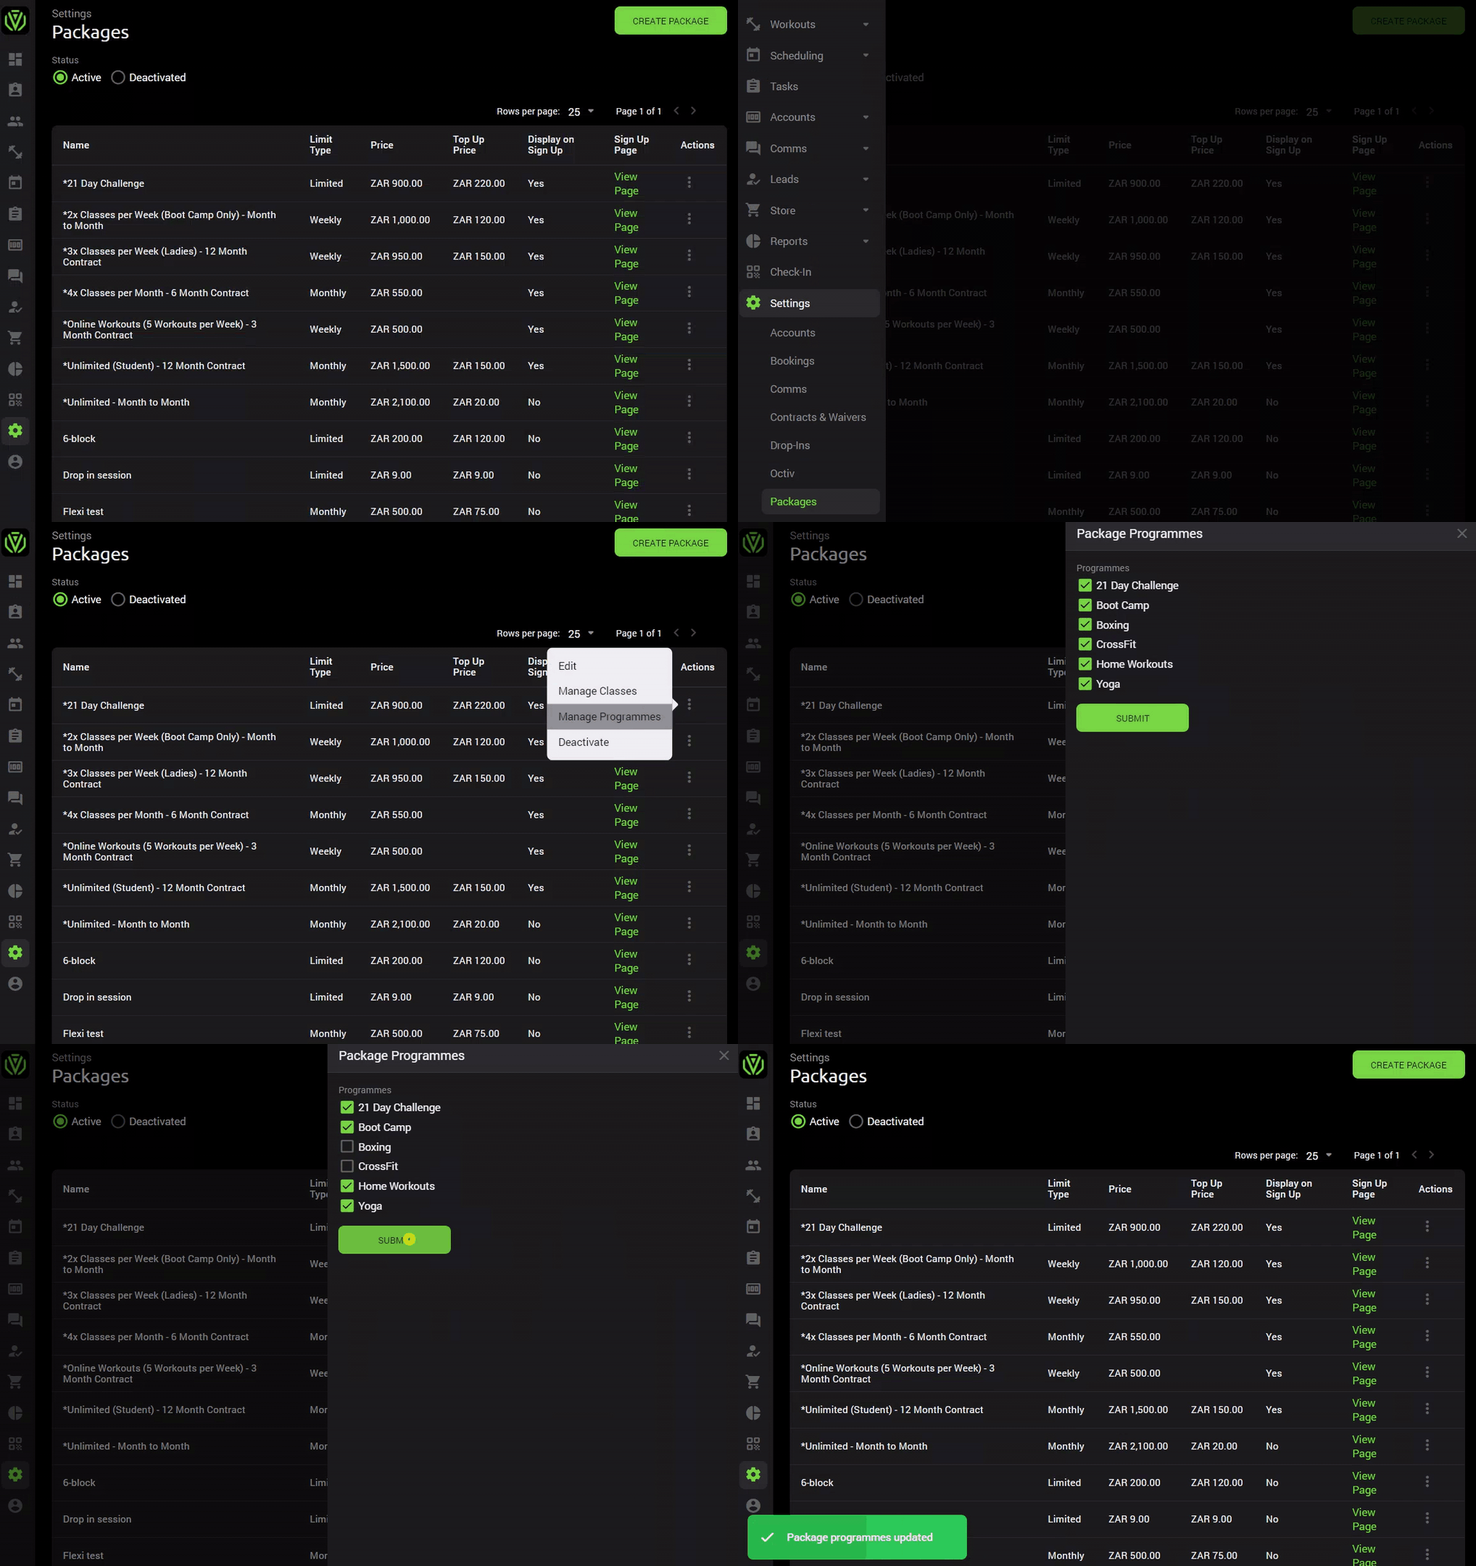
3. How to Allocate programmes:
Where you want to limit the view of programs for some packages, it is possible to restrict these. Members that are allocated to this package will then only be able to view the loaded workout programs allocated to the package.
Settings > Packages > Click on the action button next to the package > manage programmes > select which programmes have visibility to this package > submit.
4 . How to allocate Locations:
If managing more than one location via Octiv, it is possible to allocate packages to certain locations.
The packages will only reflect on the signup widget for the allocated locations as well as when adding a member manually only the assigned packages to that location will pull through.
Go to Settings > Packages > Click on the action button next to the package > manage locations
See Location-Specific Packages