Widget Set Up and Integrations
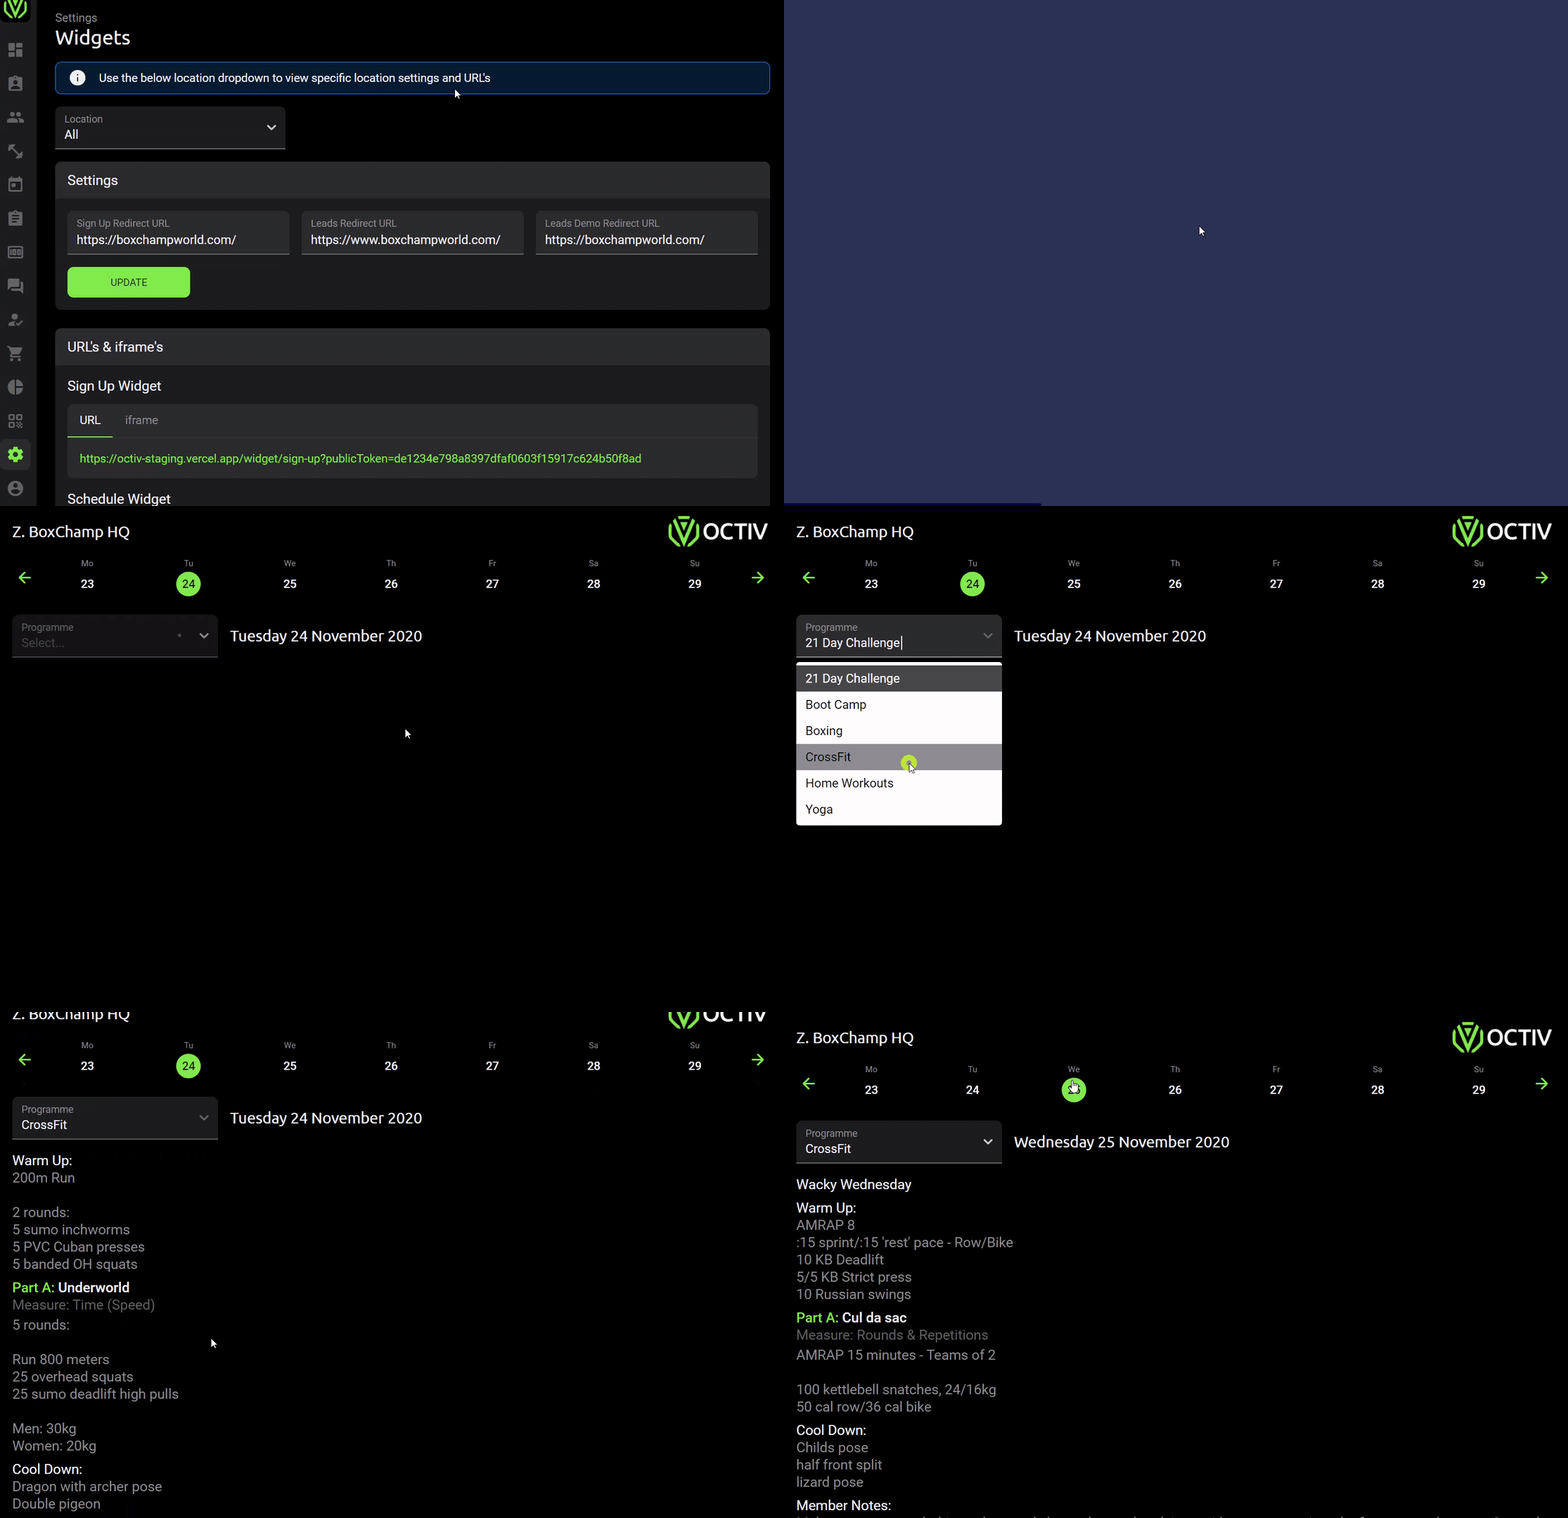
A widget is a component of an interface, that enables a user to perform a function or access a service. Octiv provides you with widgets that you can plug into your website or social media profiles.
A widget is a component of an interface, that enables a user to perform a function or access a service. Octiv provides you with widgets that you can plug into your website or social media profiles, namely; Signup Widget; Schedule Widget; Workouts Widget; Leads Widget; Leads Demo Widget.
The facility’s widgets can be found under:
Settings > Widgets
You may need to give your web designer the iframe code to plug into your website.
You can also get a preview of what the iframe would look like by copying the URL link into your browser.
You are also able to send the URL link via any social media, where prospective members can then access the page even if the widget hasn't been integrated into your site.
If your profile has more than one location you are able to either implement the global widget which will view all locations or just the location specific widget/ URL.
Make sure to paste your preferred website URL into the redirect sections under the widget settings. After the members have filled out any of your incorporated widgets they will be redirected to your desired web page.
- Sign Up Widget:
The signup widget allows prospective members to sign up to Octiv through your website or any form of social media. Depending on your signup and package display settings, new members can follow the easy step by step sign up.
First they will choose their package, next fill in their personal details and select their payment option. If you are running debit orders they will be asked to:
RSA: enter their account details
Rest of the world: accept the GoCardless mandate
Next - if you are working with a contract and waiver - they will need to accept both of these and then be added to your members list.
After the sign up the member will automatically receive a welcome email which includes all instructions on how to download the app. Additionally, if they accepted the waiver and or contract, these will also be emailed to the member with their details filled in.
The owner and admin staff are cc’d into the welcome email to the member. They receive an email saying that a new member has signed up as well as the accepted waiver and or contract. The accepted waiver and contract can also be downloaded from the Octiv platform at any time.
To see how to manage your signup settings - Package Sign Up Settings Through The Widget & Sign Up Widget Explained
To see how to upload your contact and waiver go to - Contracts & Waivers
To see how to manage your packages display - How To Enable And Disable A Package From The Signup Widget - Schedule Widget:
This widget reflects your live schedule as well as how busy your classes are. It will always reflect the latest updated version of your class schedule.
Your drop-in packages will reflect on this widget so that non members can buy sessions to attend your classes.
See Drop-Ins to set this up - Workout Widget:
Use the workout widget to display the workouts that have been programmed for the day or days ahead on your website or social media platform.
Remember the workout widget will only display the workouts according to your workout visibility located under your settings.
The workout visibility setting is used to determine how far in advance your members are allowed to see what the programmed workout for the day is.
Settings > Workouts > Select how far in advance can a member view a workout.

- Leads Widget:
Using the leads widgets allows prospective leads to send an inquiry or express interest in a trial class by submitting a leads form directly from your website.
It is important to note the difference between the Leads Widget and the Leads Demo Widget:
The personnel (location admin, admin and owner) will receive an email notification on submission of the widget form, this too would trigger an automated response from your platform to the prospective lead.
You are able to customise or disable your automated response under:
Settings > Comms > Lead member registration > edit/ disable - Leads Demo Widget:
This is used in the event that you offer a free trial class. On sign-up the prospective lead would need to accept a waiver. This will then be captured under the request for a demo status under manage leads, thus mitigating the need for them to sign a waiver when they come in for their session.
The personnel (location admin, admin and owner) will receive an email notification on submission of the widget form, this too would trigger an automated response from your platform to the prospective lead.
You are able to customise or disable your automated response under:
Settings > Comms > Lead member registration(demo request) > edit/ disable
The reason why these two are separated is so the automated response can be appropriate to the action. Also, so that you can apply different sales strategies to each type of inquiry.