
Copy API Keys from Stripe Account
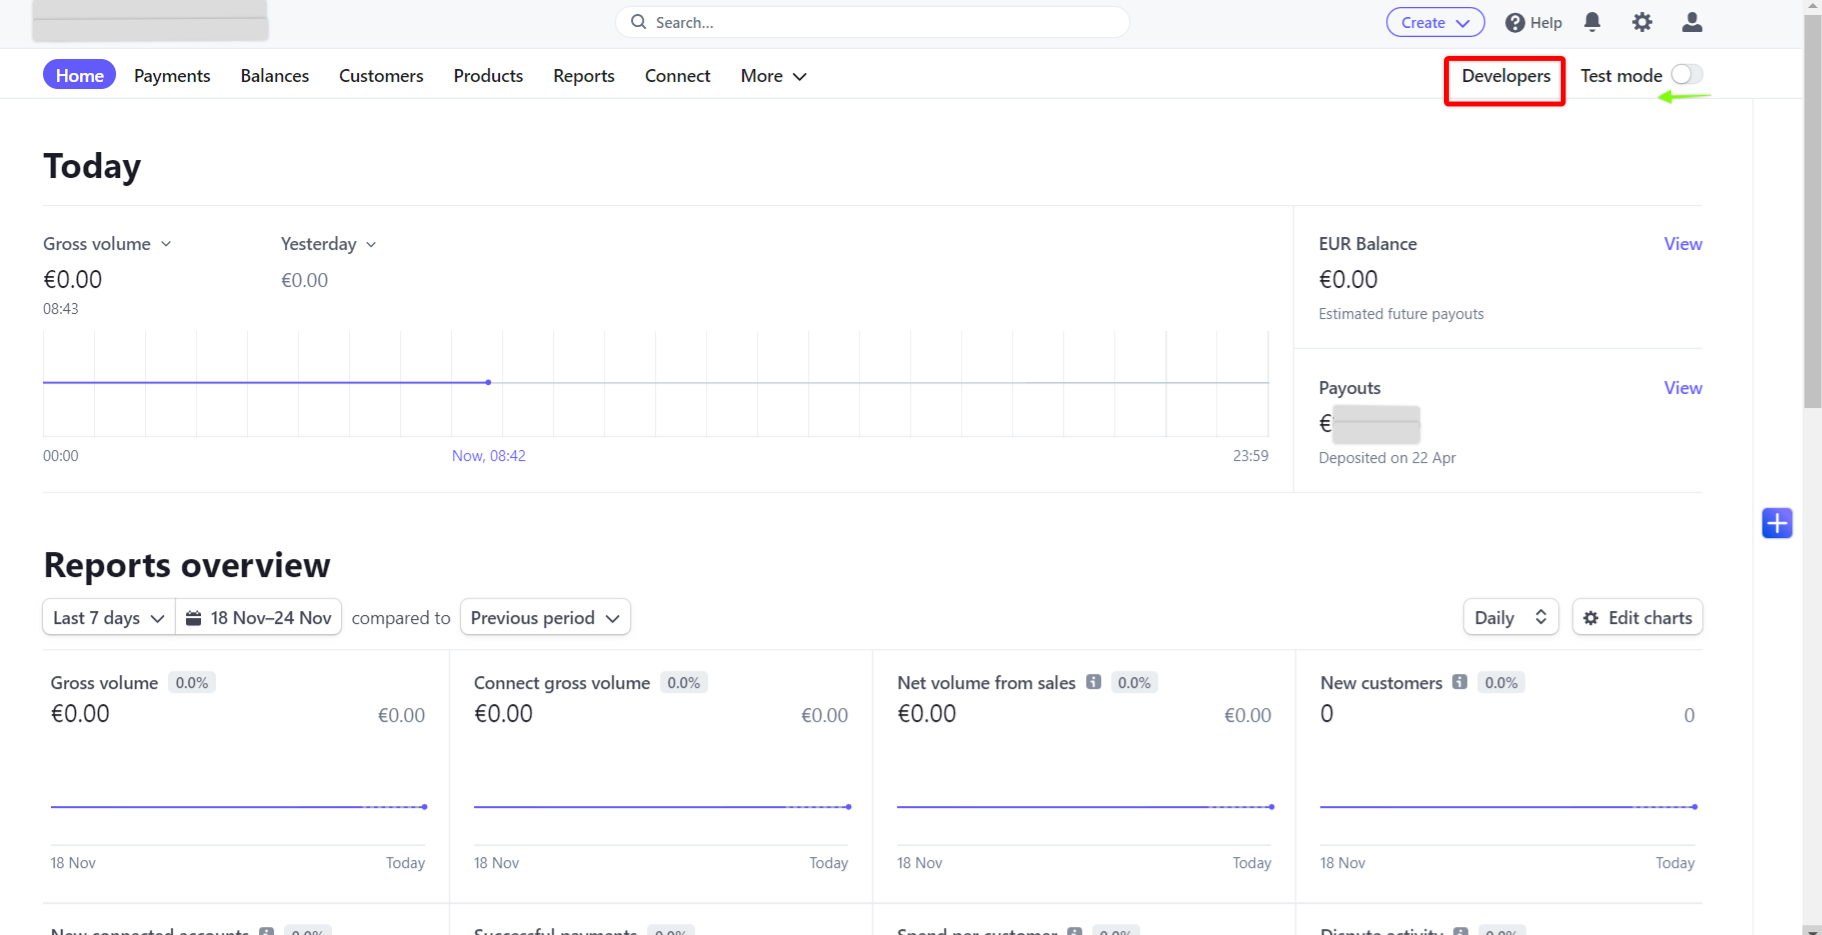
1. Log into Stripe
- Click on "Developers" in the top right corner
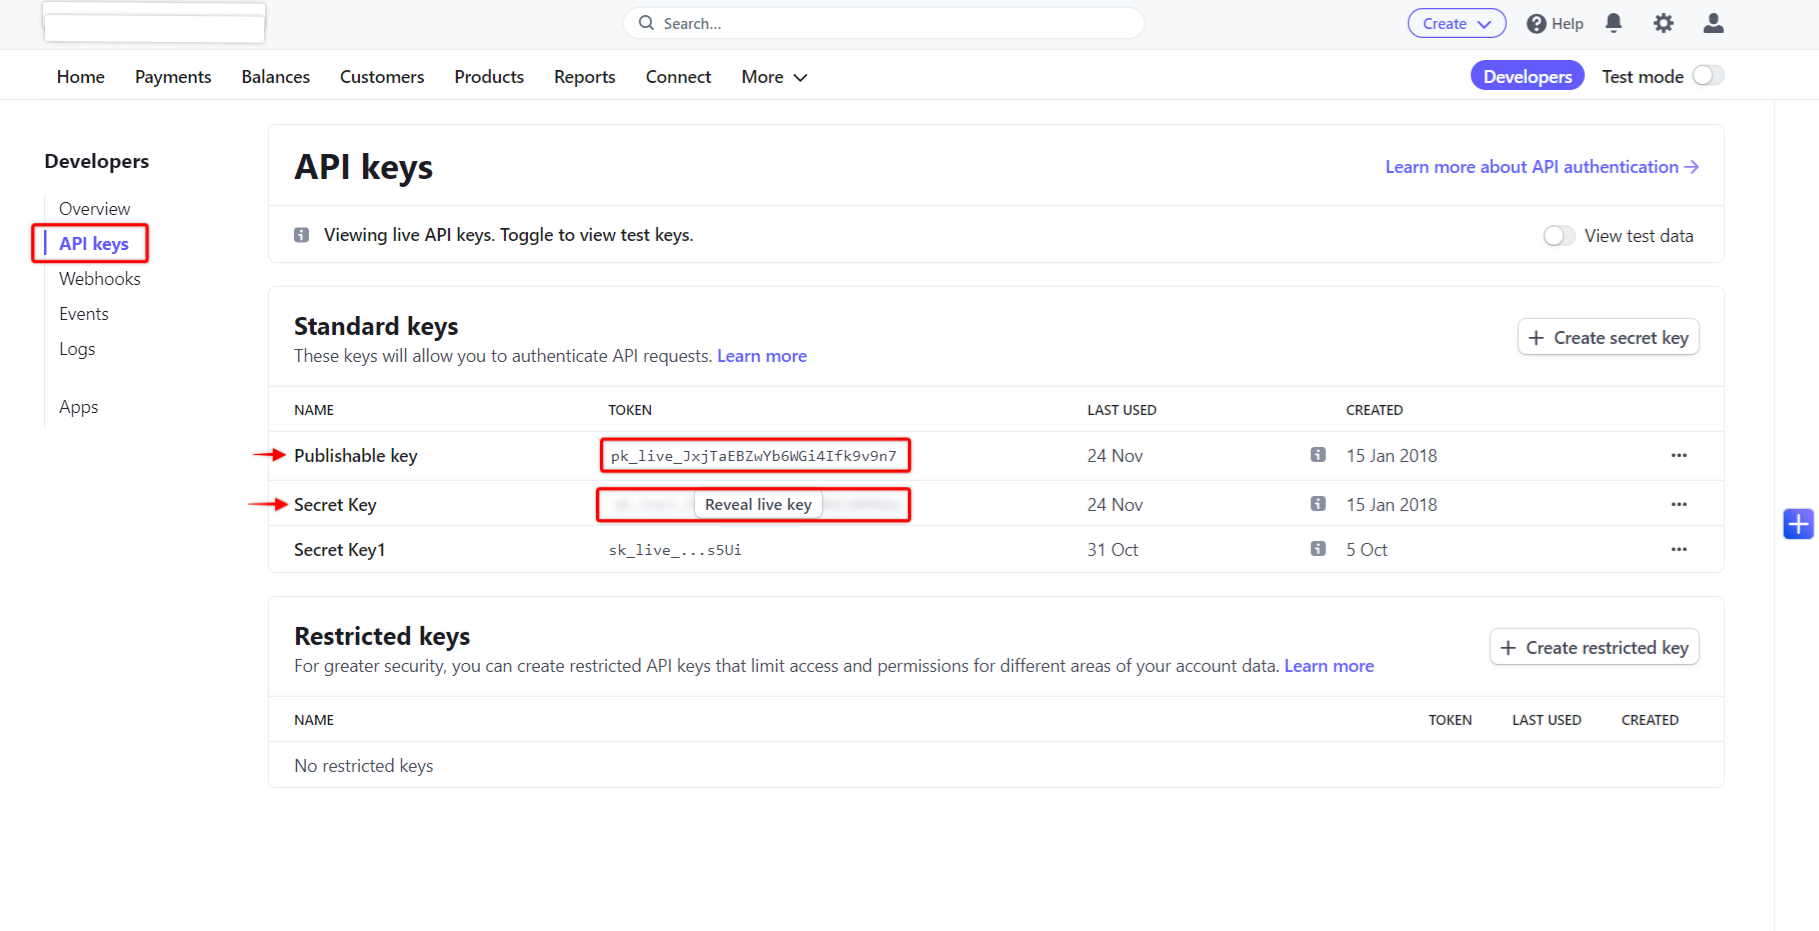
- Click "API Keys"
- Copy each of the "LIVE keys" from your Stripe account into your Octiv account under their respective fields - This would be;
* Publishable key
* Secret Key (click on "reveal live key" to view the key"
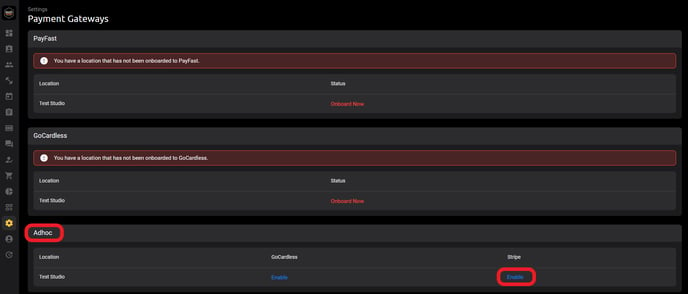
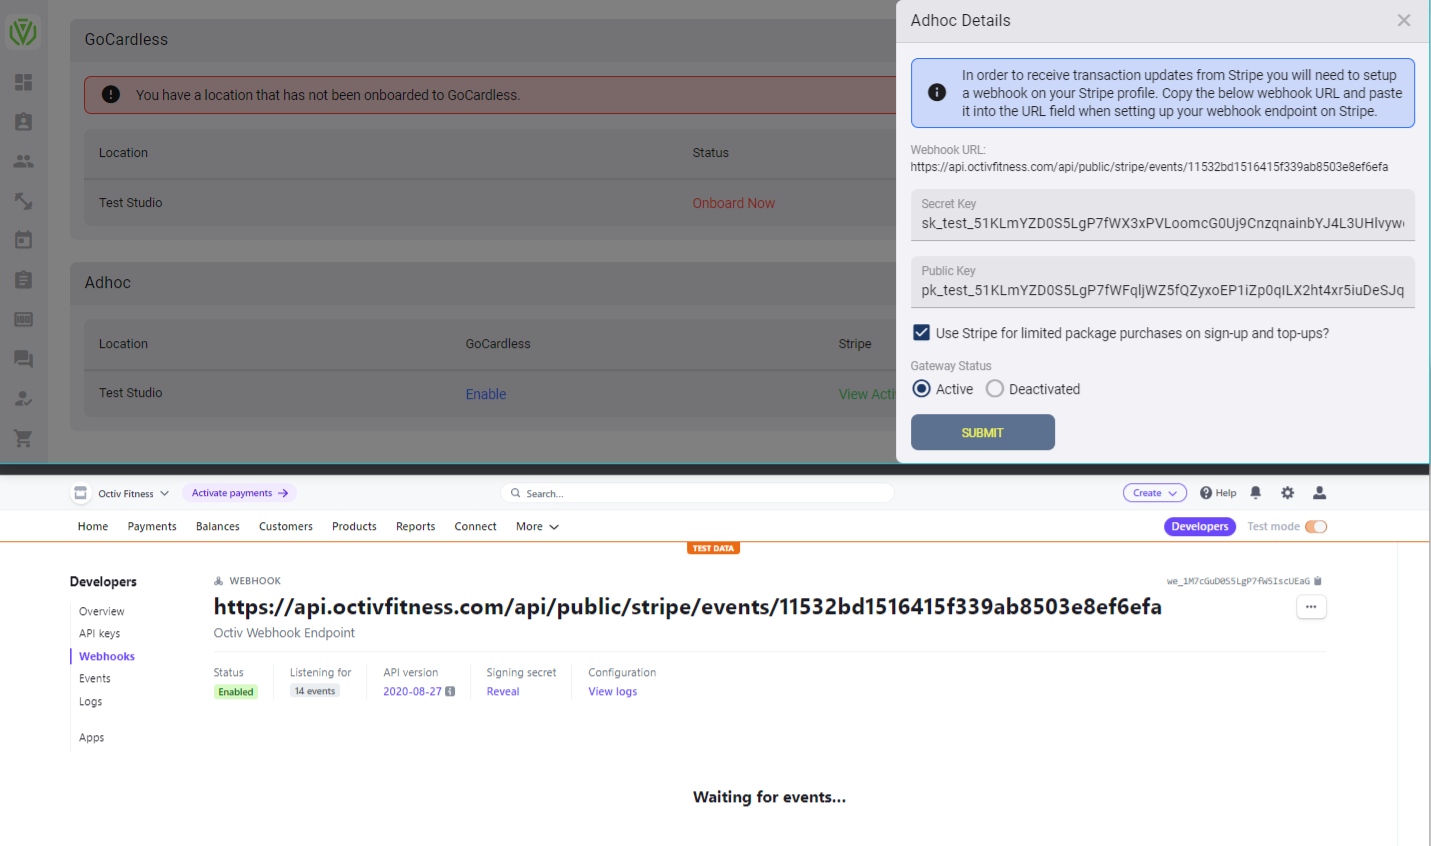
5. Log into your Octiv account and navigate to: Settings > Payment Gateways > Adhoc > Click on View/ Edit below Stripe > Paste the Keys into the respective fields
\\ note the keys shown below are not valid, please use the correct keys from your own profile
Create Stripe Webhook End point in Octiv
Log into your Octiv account and navigate to
Settings > Payment Gateways > Adhoc > Click on View/ Edit below Stripe > Paste the Keys into the respective fields > Submit.
Save to generate the Webhook Endpoint URL
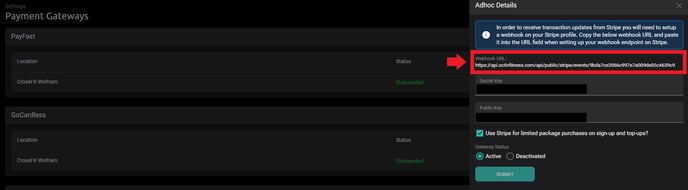
Add the Octiv Webhook Endpoint URL to your Stripe account and amend the events.
1. Copy the Webhook Endpoint URL from your Octiv account
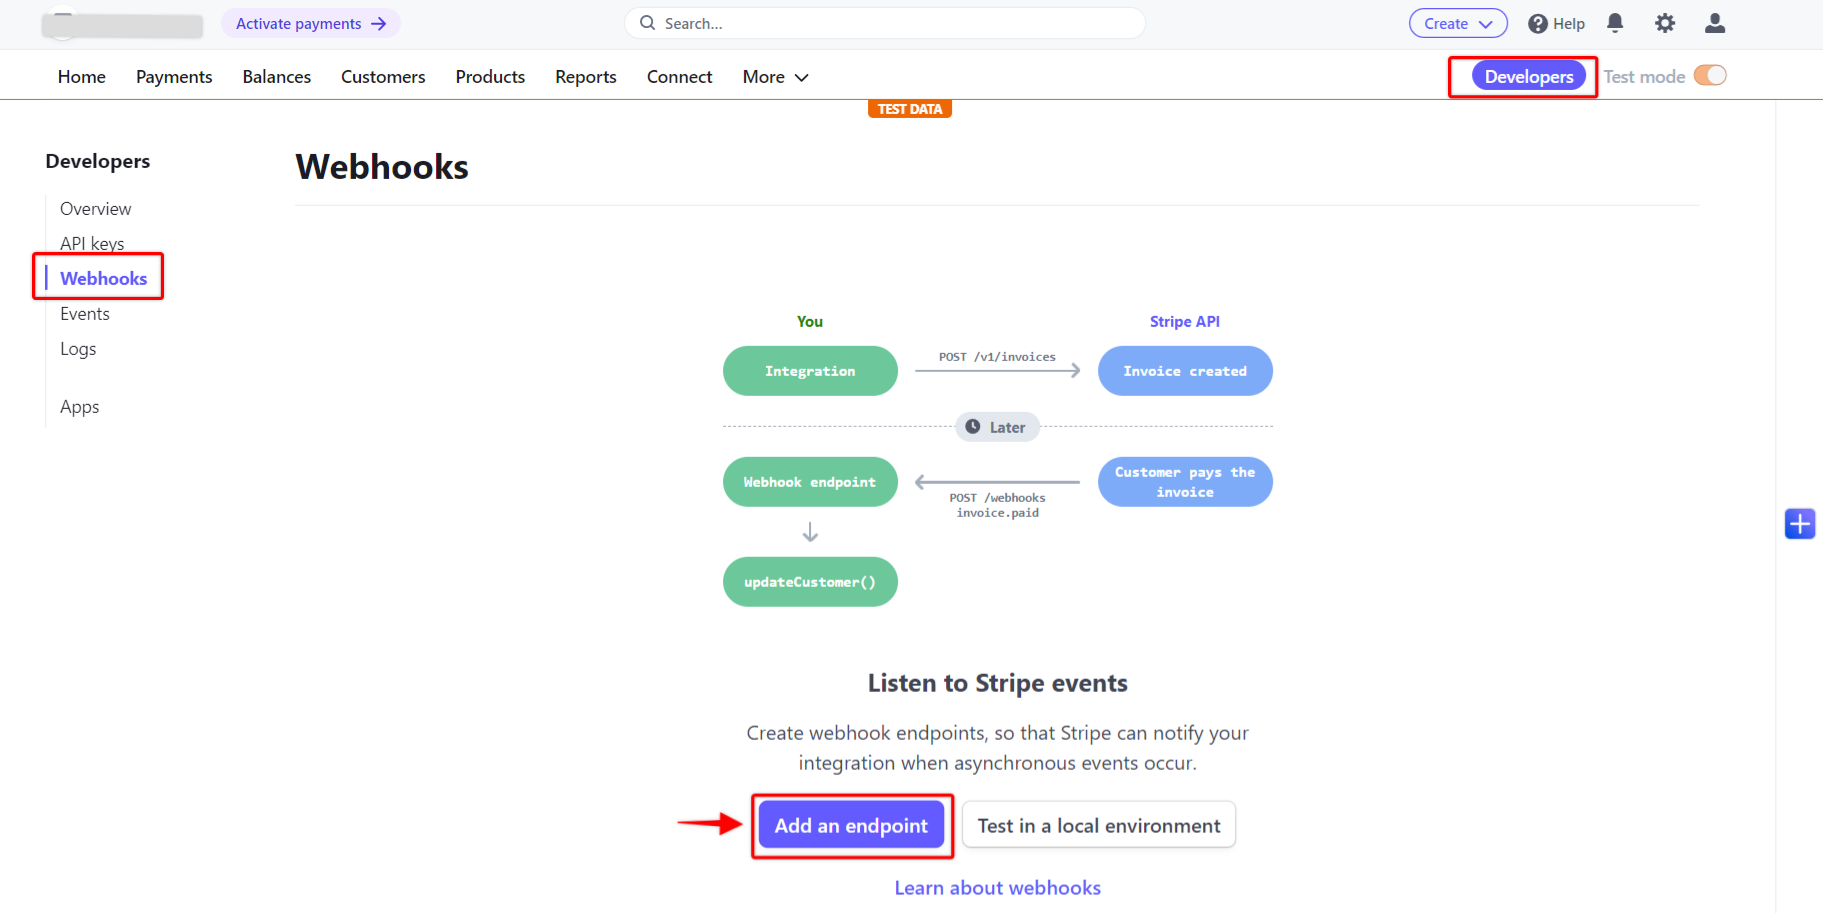
- In your Stripe account, still under "Developers", navigate to the "Webhooks" tab in the left hand menu
- Click "Add an end point"
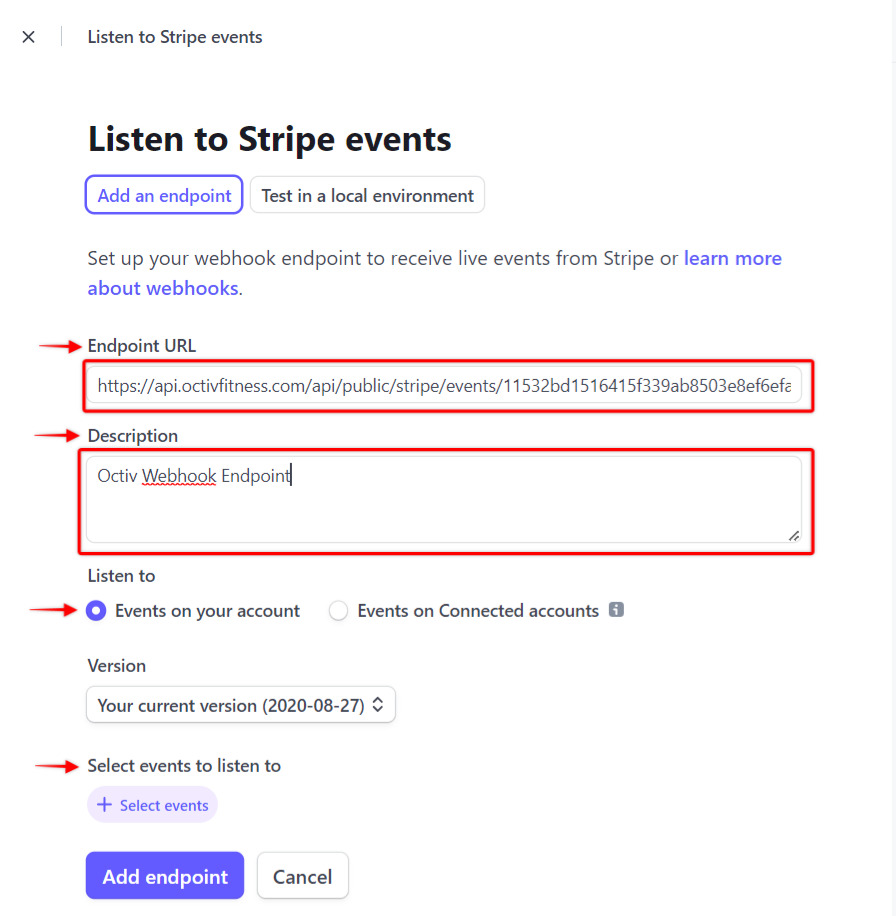
- Paste the Octiv Webhook Endpoint URL into the text field "Endpoint URL"
- Label the description "Octiv Webhook Endpoint"
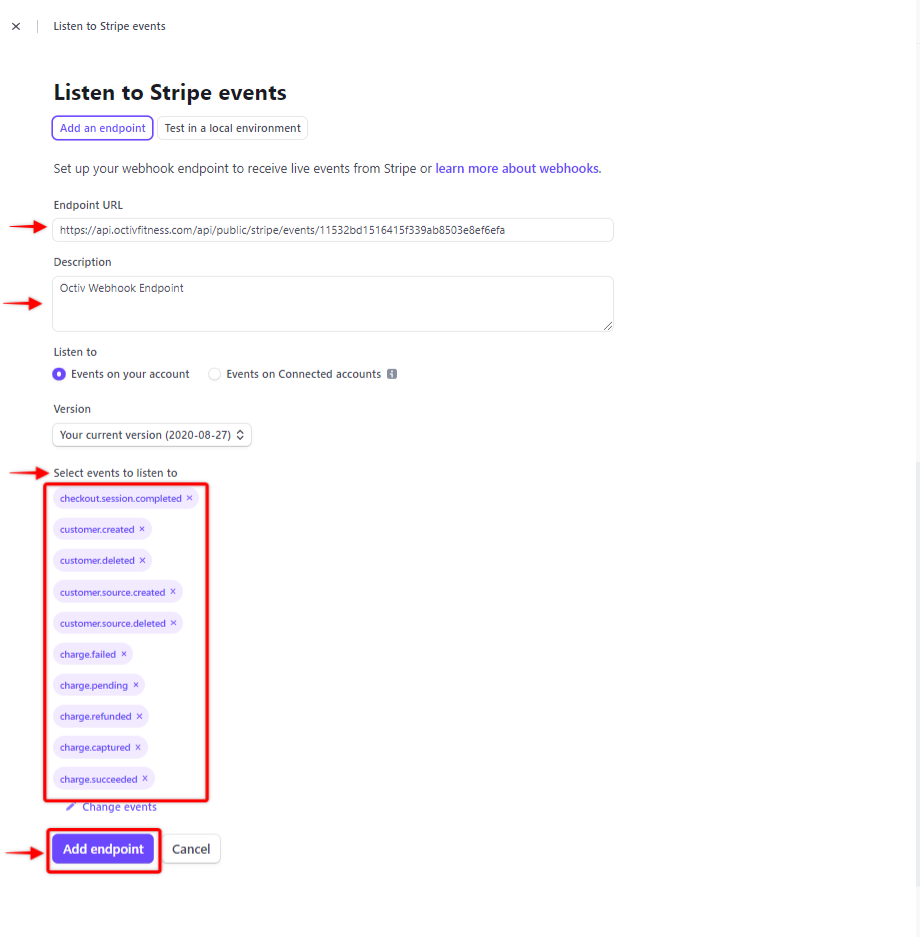
- Under "Select events to listen to", click on "+Select Events" and select the following 10 events;
* checkout.session.completed
* customer.created
* customer.deleted
* customer.source.created
* customer.source.deleted
* charge.failed
* charge.pending
* charge.refunded
* charge.captured
* charge.succeeded
7. Once the above events have been added you can now select "Add endpoint" to save your changes.
4. Now you are done and should be live to take payments via Octiv and Stripe.
Note: If you have more than one location make sure to allocate the location-specific keys to the correct location