How do I Capture Leads?
The leads functionality is a vital part in gaining member acquisition and tracking the leads through the sales pipeline.
The leads functionality is a vital part in gaining member acquisition and tracking the leads through the sales pipeline.
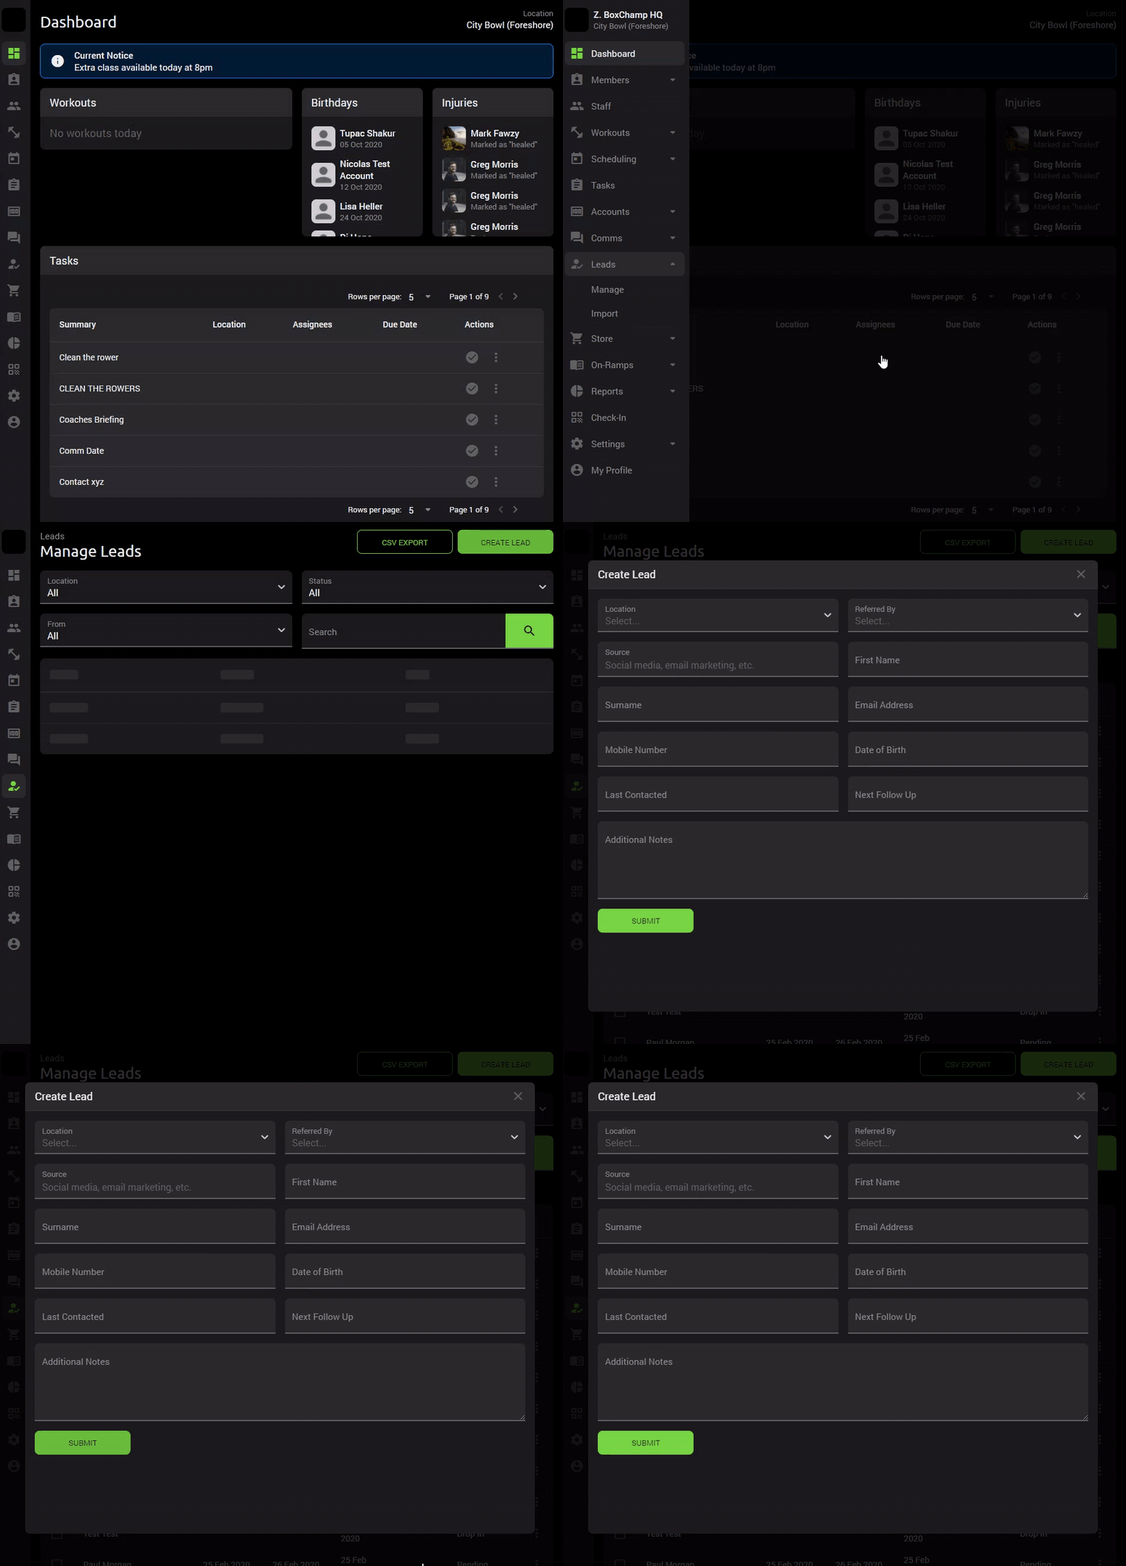
There are two ways in which leads can be captured in Octiv: by using the leads widgets, or by manually capturing your leads.
MANUALLY CAPTURING LEADS
Left hand Menu > Leads > Manage > Create Lead > Fill in details > Submit

Sections Explained:
- Location: Assign your lead to the correct location if you have more than one facility loaded to your platform.
- Referred By: This is the person who has referred the lead to your facility.
- Source: This is where your lead originated from for example; walk-in, Facebook, website.
- Status: Assign your leads a status to track them through the sales pipeline i.e. from when a lead is added to conversion.
- Last contacted and next follow up: Dates can be set and updated to when the prospective lead was last contacted and the due date for their next contact point.
- Additional notes: Conversations, needs and reminders can be added to the notes section. This helps you to get an understanding of who the lead is and the sales approach for this lead.
On the dashboard, you will find a leads widget. This will help you and your staff to keep track of their assigned leads and to follow up with them.